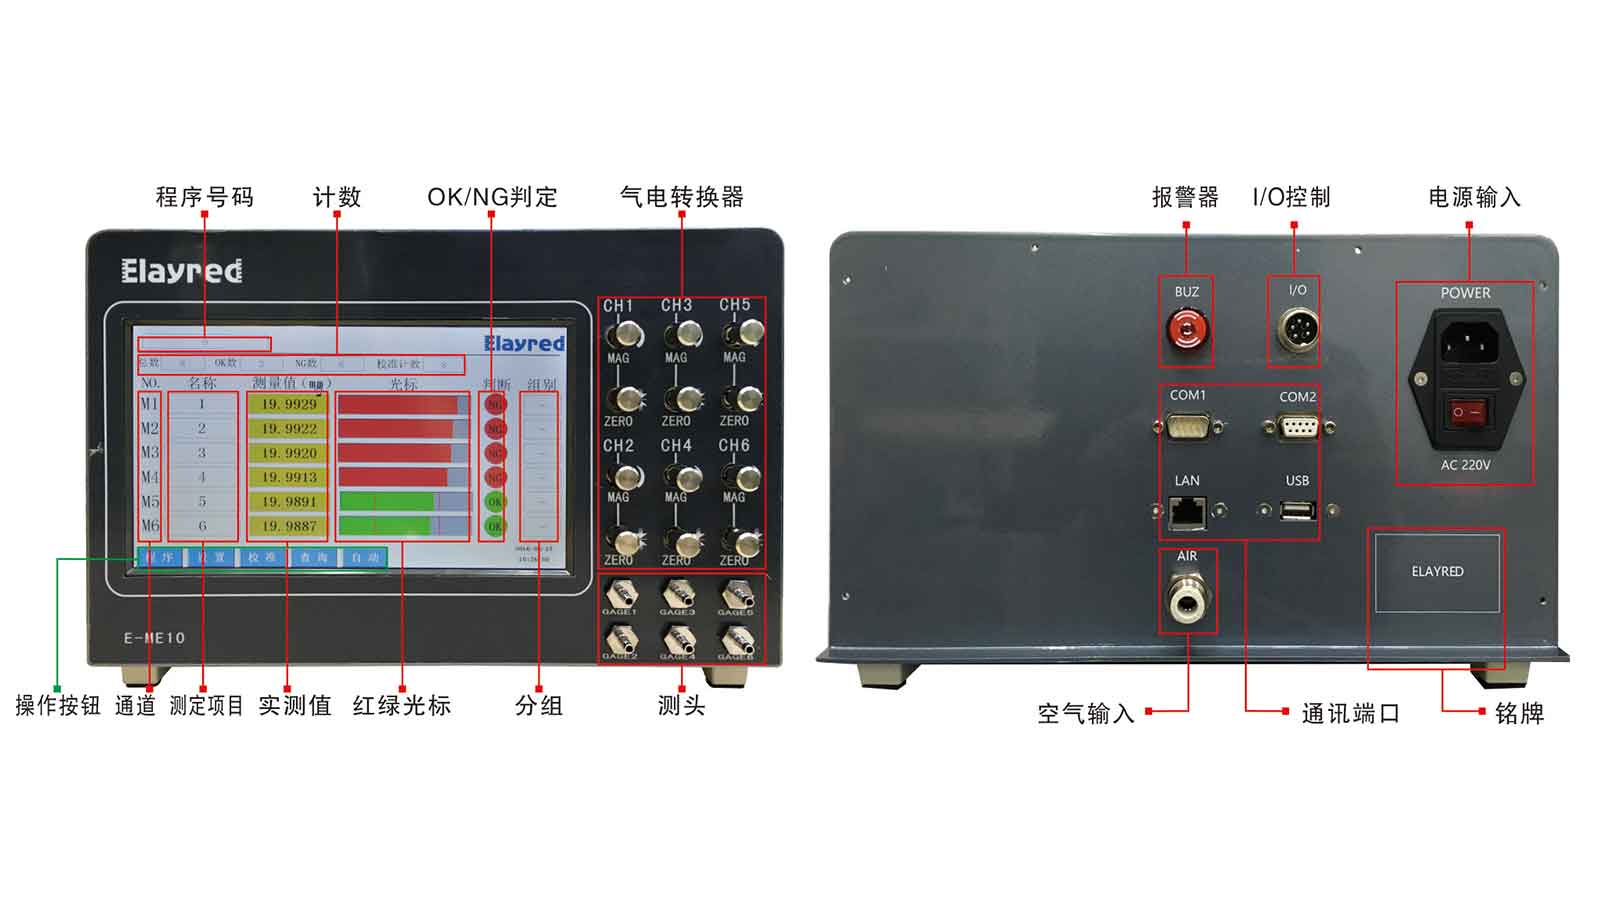
To achieve pneumatic precision measurement, it is necessary to sense the size change of the workpiece to be measured, which is usually called the measuring head, that is, the gas measurement and calibration in pneumatic measurement. The signal of gas flow or pressure change induced by gas calibration is processed by the measuring instrument body and displayed to the user.


Model:E-MA4; Measuring range:±25μm,±50μm; Resolution:0.1/0.2/0.5/1.0; Total error:2%; Number of channels:Single; Measuring function:MXMNMNIAN-AMIN2

Model:E-MC5; Measuring range:±25μm,±50μm; Resolution:0.1/0.2/0.5/1.0; Total error:≤0.3μm; Number of channels:Single; Measuring function:MXMNMNIAN-AMIN2

Display screen:7Inch; A/E:EA-2; Accuracy:≤0.3μm Resolution:0.1/0.2/0.5/1.0 Unit:μm/mm/inch